Category Archives: micro tutorial

jQuery.unbind()

Binding Problems

jQuery JavaScript Library

Typically in jQuery when you bind an HTML element with some event this event is fired every time the user (client) triggers it. Thus when you’ve a click event attached on a button you can click it as many times as you want. In some rare cases this can be tricky. Let’s imagine the following scenario.

  1. The user clicks on a “vote” button.
  2. Some AJAX calls are performed.
  3. After a successful AJAX call you setup a cookie to deny further votes from this machine.

This seems to be pretty well known scenario, but as the click event is attached to the button there is enough time to click several times on the “vote” button and to vote several times. In this case before the cookie is set the user can vote more than once. Continue reading jQuery.unbind()

Scroll an IFRAME Content to a Predefined Position

IFRAME Source

Usually when you use an IFRAME tag to link an external source the page that’s referenced by the SRC attributes is loaded at the top left corner. This is the default behavior, but sometimes you’d like to show to your users not the entire page from the top left corner, but to show only part of the external page instead.

In most of the cases the reference is external and you don’t have control over the external page. Thus you’ve to scroll the IFRAME content to the desired position. This of course is impossible. Yeah, there are some JavaScript hacks, but they’re all a bad solution, because the scrolling occurs only after the page is loaded.

The Solution

You can wrap the IFRAME into a div and scroll the DIV content using absolute TOP and LEFT CSS properties.

Here’s an example:

#my-div
{
    width    : 400px;
    height   : 200px;
    overflow : hidden;
    position : relative;
}
 
#my-iframe
{
    position : absolute;
    top      : -100px;
    left     : -100px;
    width    : 1280px;
    height   : 1200px;
}

Here you have one DIV with dimensions 400x200px. Now by moving the IFRAME within it you can position it on the right place.

<div id="my-div">
<iframe src="http://www.example.com" id="my-iframe" scrolling="no"></iframe>
</div>

Continue reading Scroll an IFRAME Content to a Predefined Position

How to Collect the Images and Meta Tags from a Webpage with PHP

Meta Tags and the Facebook Example

You’ve definitely seen the “share a link” screen in Facebook. When you paste a link into the box (fig. 1) and press the “Attach” button you’ll get the prompted cite parsed with a title, description and possibly thumb (fig. 2). This functionality is well known in Facebook, but it appears to be well known also in various social services. In fact Linkedin, Reddit, Dzone‘s bookmarklet use it.

Facebook Attach a Link Prompt Screen
fig. 1 - Facebook Attach a Link Prompt Screen

Fist thing to notice is that this information, prompted by Facebook, is the same as the meta tag information. However there is a slight difference.

Facebook Attached Link Screen
fig. 2 - Facebook Attached Link Screen

Facebook prefers for the thumb the image set into the <meta property=”og:image” … />. In the case above this tag appears to be:

<meta property="og:image" content="http://b.vimeocdn.com/ts/572/975/57297584_200.jpg" />

And the image pointed in the SRC attribute is exactly the same as the one prompted by Facebook (fig. 3).

Vimeo Thumb
fig. 3 - Vimeo Thumb

First thing to note is that the real thumb is bigger than the thumb shown in Facebook, so Facebook resizes it and the second thing to note is that there are more meta tags of the og:… format. Continue reading How to Collect the Images and Meta Tags from a Webpage with PHP

Adding a Custom Button to TinyMCE – REVISED

Driven by the comment of Afraithe I have to apologize about the yesterday’s post. Here’s a much much simpler, cleaner way do add a custom button to TinyMCE.

<script type="text/javascript" src="<your installation path>/tiny_mce/tiny_mce.js"></script>
<script type="text/javascript">
tinyMCE.init({
    mode : "textareas",
    theme : "advanced",
    theme_advanced_buttons1 : "mybutton,bold,italic,underline,separator,strikethrough,justifyleft,justifycenter,justifyright, justifyfull,bullist,numlist,undo,redo,link,unlink",
    theme_advanced_buttons2 : "",
    theme_advanced_buttons3 : "",
    theme_advanced_toolbar_location : "top",
    theme_advanced_toolbar_align : "left",
    theme_advanced_statusbar_location : "bottom",
    plugins : 'inlinepopups',
    setup : function(ed) {
        // Add a custom button
        ed.addButton('mybutton', {
            title : 'My button',
            image : 'img/example.gif',
            onclick : function() {
                // Add you own code to execute something on click
                ed.focus();
                ed.selection.setContent('Hello world!');
            }
        });
    }
});
</script>
 
<form method="post" action="somepage">
        <textarea name="content" style="width:100%">
        </textarea>
</form>

The Problem

There is only one problem – I still cannot find easily the section of the site in TinyMCE. So I’m supposed to click on the comment’s link. This is a pity and perhaps that’s why I couldn’t find it before. Moxiecode should make this section more accessible!


Adding a Custom Button to TinyMCE

TinyMCE

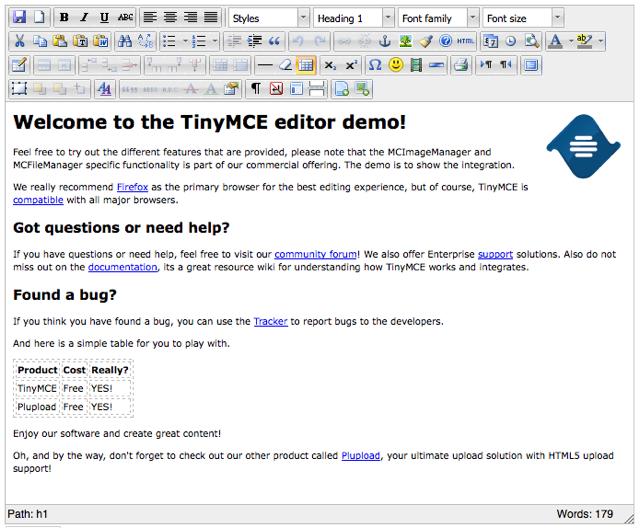
First thing to say TinyMCE is a very popular WYSIWYG online based editor. It’s very widely used in the web, as may already know it it’s part of the default WordPress installation. Out of the web, of course, there are some other editors as well. The most used and well developed projects are the Yahoo!’s YUI 2 Rich Text Editor and CKEditor also known with his past name – FCKEditor.TinyMCE Full Featured Example

Before I proceed with this post, let me say that I’m working and this tutorial is based on version 3.1.1 released on 18 Aug 2008. Continue reading Adding a Custom Button to TinyMCE